


[[{“value”:”
Thank you for reading this post, don't forget to follow and signup for notifications!
This post was originally published on this site.
Most guns, it could be said, are designed for multi-purpose use and are practical for several applications. These are more mainstream and widely accepted by the masses. But not all firearms are designed for the masses. Occasionally, niche-specific guns will come out that have a practical purpose but might be a little “out there” in terms of design. I got my hands on one of those “out there” guns for review and had an absolute blast setting it up and shooting it. That gun would be the Brawler, in .300 Blackout, from Rossi.
The Rossi Brawler in .300 Blackout
The Brawler is a single-shot break-action handgun that was initially released to shoot 45 Colt or a 410 shotshell. With its popularity (we’ll get there) in this two-for-one caliber, Rossi released the Brawler in 5.56 and .300 Blackout. You might be thinking, “What sort of practical use could the Brawler possibly have?” This is where the niche market comes in.
Advertisement — Continue Reading Below

The Brawler (especially in 410 shotshell) is a utility handgun mainly used for backcountry use or pest control. The Brawler is more valuable than carrying a revolver, for example, because it’s suppressor-ready with a threaded barrel and outfitted with a Picatinny rail to mount any optic you desire.
It’s not picky about ammunition, it’s accurate thanks to its cold hammer forged barrel, and it’s a darn tough gun. If you’re still with me, let me tell you about the practicality and the “coolness” of the Rossi USA Brawler.
Advertisement — Continue Reading Below
The Brawler’s Action
I’m a fan of single-action-only firearms. They’re just plain fun to shoot because they require more effort than a semi-automatic. I immediately gravitated toward the Brawler because it’s a single-action-only gun that is also a break-action.
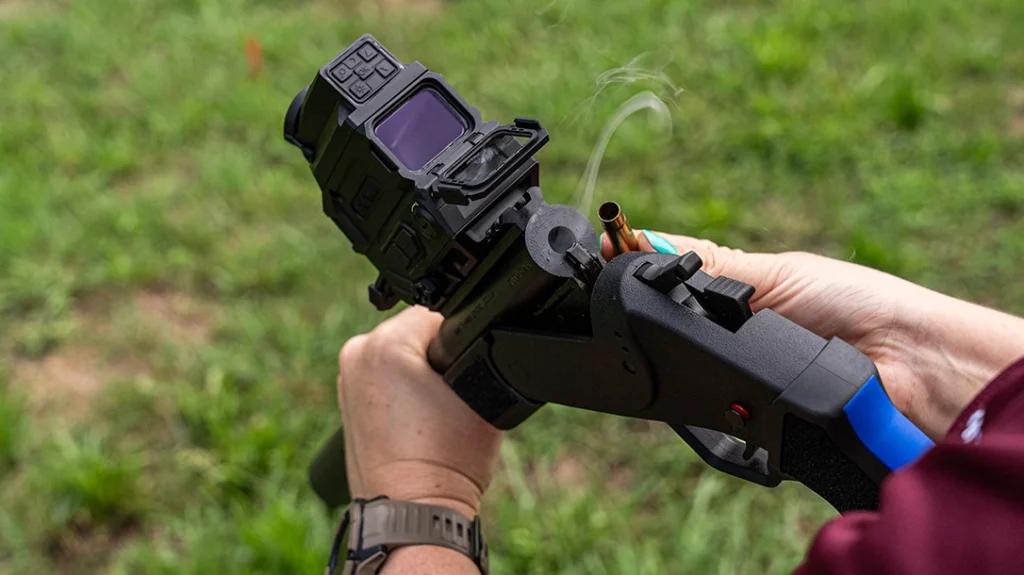
The button on the right side of the gun, next to the hammer, will open the action when depressed. To load the gun, simply drop a round into the chamber and close the action. To unload it, you open the action and manually pull the spent casing out of the chamber.
Advertisement — Continue Reading Below
The Brawler doesn’t just fall open. It is a smooth action, but it requires a little force to open and close. The easiest way to break it open is to grip the textured foregrip area with your support hand and pull down. I also just pulled down on the barrel to manipulate the gun. However, if the barrel is hot, you shouldn’t do this.
Firing the Brawler
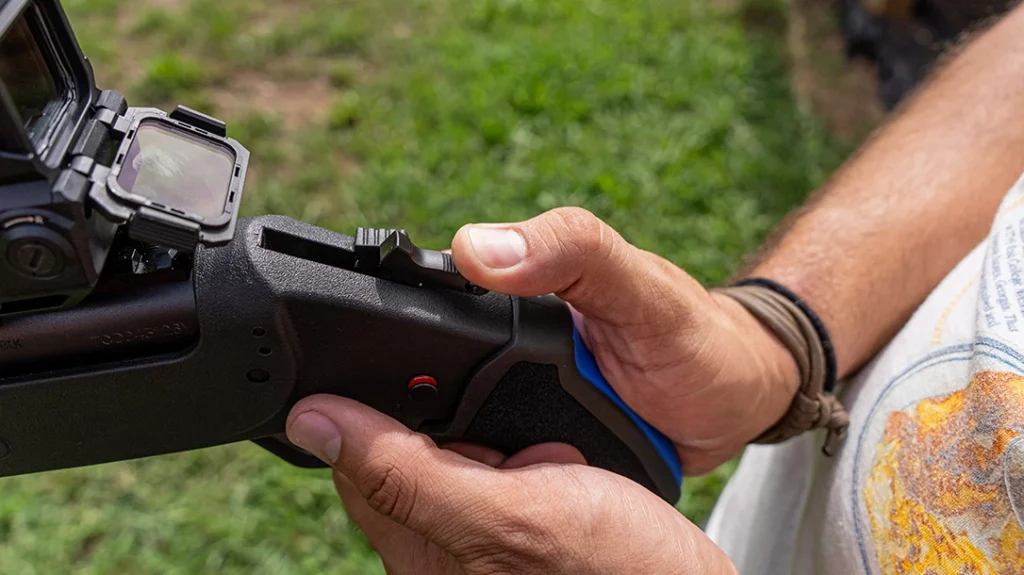
The Rossi USA Brawler has an external hammer that must be manually cocked to prepare the gun to fire. The safety is a cross-bolt safety that is simple to operate. To disengage the safety and prepare to fire, you simply push the button from the right side until the red band is visible on the left side of the gun. This tells you the gun is “hot.”
To re-engage the safety, push the button from left to right until the red band is no longer visible. I recommend dry-firing the gun a few times to practice these mechanics before loading the gun with a live round.
Advertisement — Continue Reading Below
The Brawler uses a transfer bar as its firing mechanism. When the hammer is fully forward (not cocked), and the trigger is released, there is no mechanical contact between the hammer and the rear of the firing pin. When the hammer is manually pulled back (cocked), the transfer bar moves up in position between the hammer and the firing pin.
With the safety off and the trigger pulled back, the hammer face contacts the transfer bar, which strikes the firing pin and discharges the round. When the trigger is released, the transfer bar drops down and leaves space between the face of the hammer and the firing pin.
Advertisement — Continue Reading Below
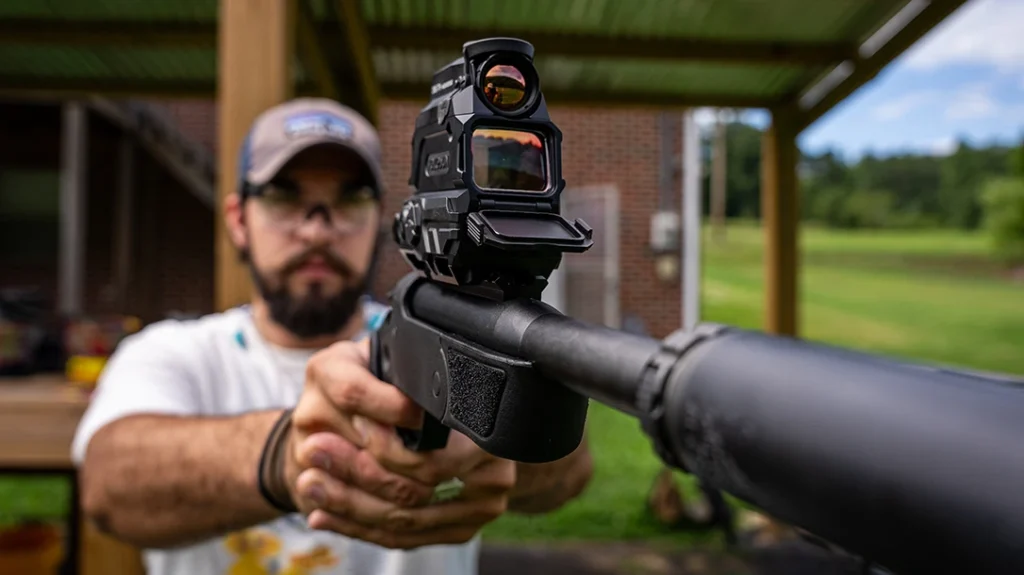
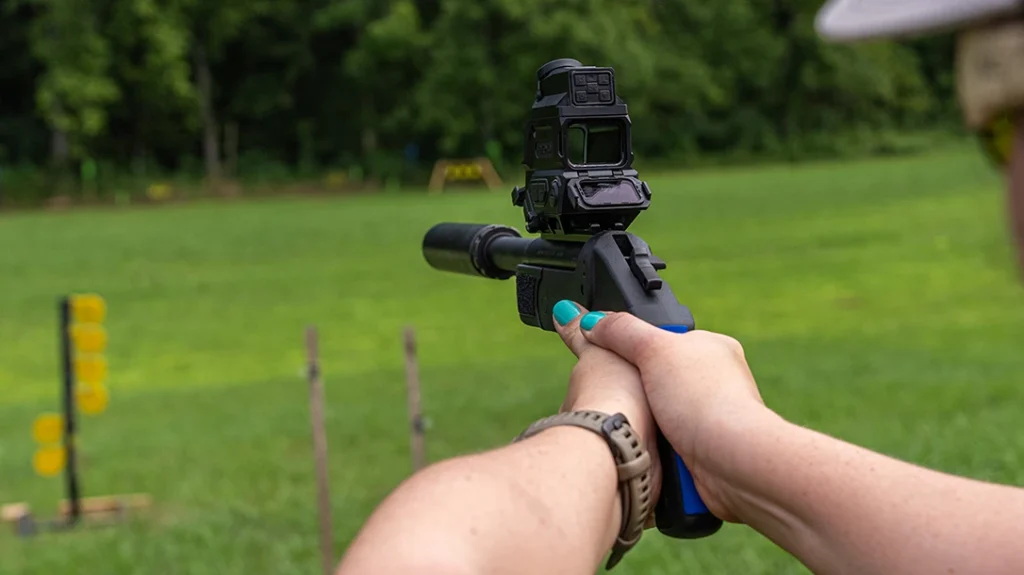
Picatinny Rail
The real cool factor of the Brawler is the long Picatinny rail on top that allows you to mount large red dot optics or even a scope. And before you ask why you might need a scope on the Brawler, let me tell you that this gun has some range to it. It was making impacts on eight-inch steel targets at 75 yards with ease.
I knew precisely what optic I wanted to mount on the Brawler. You see, I have a groundhog infestation on my property. They are digging massive tunnels that have tripped me up a time or two and caused significant damage to the soil and grass. These rodents randomly pop out of their holes during the day and at night.
I knew I needed one optic that could take these pests out at any time of day. It was the Holosun Digital Reflex Sight – Thermal.
Advertisement — Continue Reading Below
The Holosun DRS-TH optic can operate as a red dot only, a thermal optic only, or as a red dot sight with a thermal overlay. The red dot reticle can be set up to your preferences thanks to Holosun’s multi-reticle design. Finally, the thermal overlay features a digital cross or T-style night vision reticle, along with magnification levels of 1x, 3x, and 5x.
To start, always zero the red dot first before turning on the thermal digital reticle. Then you can adjust the digital reticle to line up with the red dot position. With the red dot optic off, check your zero with just the thermal digital reticle to verify it’s correct. You can adjust the digital reticle zero if needed.
Running the Holosun DRS-TH
The thermal modes include white hot, black hot, outline, and highlight. The thermal has a runtime of 10 hours, while the red dot has a runtime of over 50,000 hours. You can record video with a single button press, as well as capture photos and download the files to your computer.
Even with this being a thermal optic, there are four night vision-compatible brightness settings. There are two lens covers: a rear lens cover and a front lens cover (not the thermal sensor cover).
To use the red dot optic and see your target clearly, you will want to open the front lens cover. When you close it, you can still see the reticle and use it to shoot, but there’s no field of view through the optic window, meaning the reticle is occluded. To use the thermal, you must remove the thermal sensor cover, which is the rubber cover on the topmost part of the optic.
When using the thermal overlay, it is best to close the front lens cover. You can use the thermal with it open, but it isn’t as clear. I rarely open the rear lens cover, as it serves as a barrier against dust, debris, and water, and helps reduce glare. Since I knew that I would potentially be shooting this gun at night, my next task was to be a good neighbor and mount a suppressor.
Threaded Barrel
The Brawler by Rossi comes standard with a threaded nine-inch barrel. The thread pitch pattern for a gun chambered in a .30 caliber is typically 5/8×24. This is what Rossi used for the .300 Blackout model.
The number one thing I look for in any sort of hunting, pest control, or backcountry use firearm is the ability for it to be suppressed. You can lose the ability to hear with just one gunshot fired while not wearing hearing protection. It’s that simple. Suppressors are the solution for reducing noise, decreasing muzzle rise (felt recoil), and dimming muzzle flash.
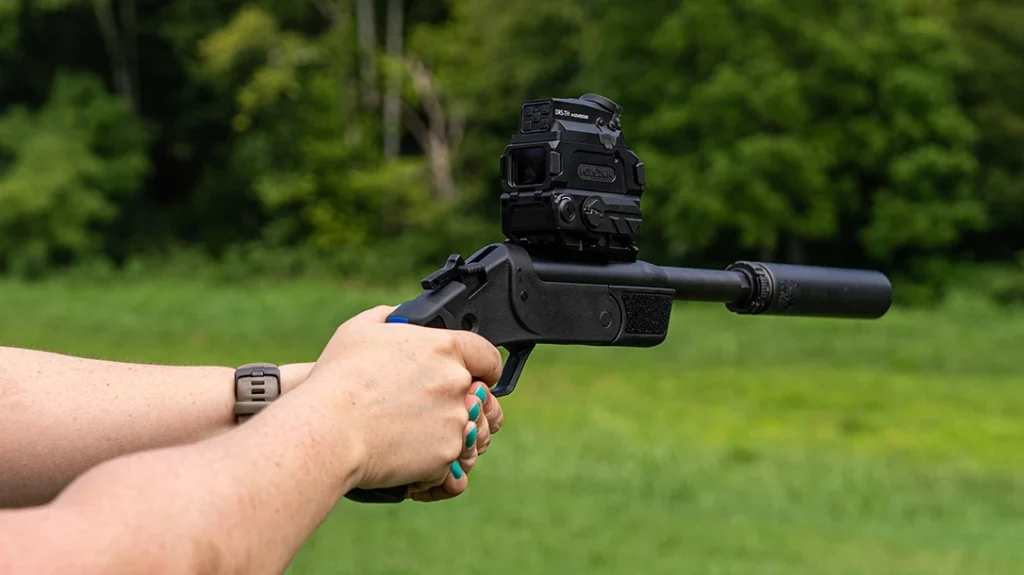
The Brawler weighs three pounds, and the Holosun thermal sight weighs a little over one pound. So, I knew I didn’t want to add a ton more weight to the overall build. I decided to mount a titanium suppressor to save weight.
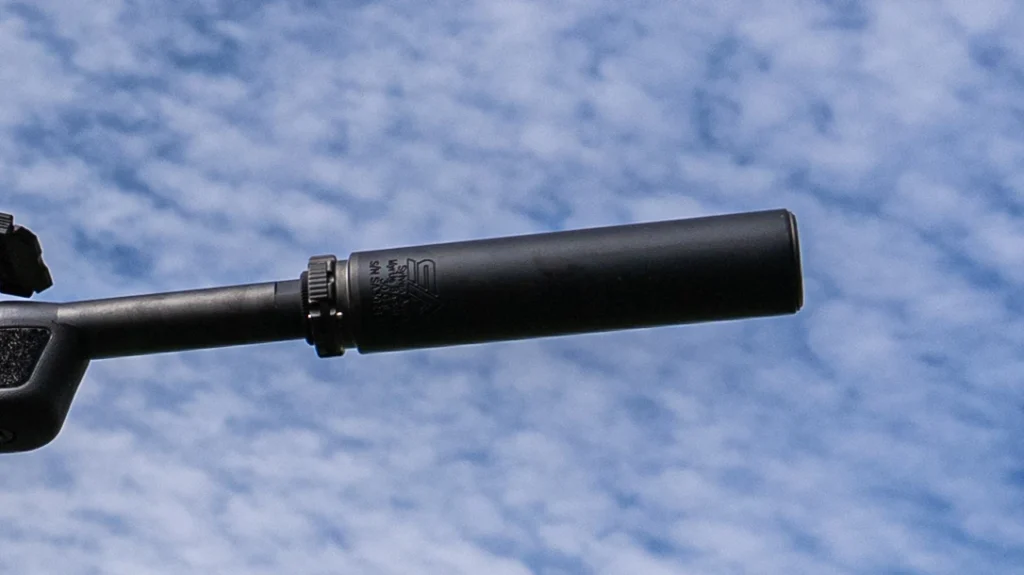
A brand-new suppressor for Sylvan Arms this year is their 6-inch 300BLK Suppressor. It has a Grade 9 titanium tube and Grade 5 titanium baffle stack. The suppressor weighs just 10.9 ounces and can be directly mounted to the threads. However, it can also be quickly connected/disconnected using Sylvan Arm’s QD muzzle device.
Using the QD device added a minor amount of weight to an already heavy gun and only changed the overall length from 6.2 inches to 6.4 inches. I posted a video on Instagram of my first shot through this complete setup, and the noise reduction was unbelievable.
Sylvan Arms recommends using this suppressor with a 5.5-inch barrel or longer. So, the 9-inch barrel on this gun was a good match for it.
Suppression Testing
I didn’t perform an accuracy or chronograph test on the Brawler. However, I did try three types of ammunition through it to hear the difference of each through the suppressed gun.

Some aspects of a suppressor’s performance are subjective. There are decibel reading devices that can give you the scientific performance of a suppressor with each type of ammunition. However, these devices can’t tell you how the tone might sound or if a suppressor will sound as quiet to one person as it does to another.
Sometimes the only way to find out what ammunition you prefer is by firing it and judging for yourself.
Feeding the Rossie Brawler
I picked out three very different ammunition with all different bullet profiles.
The first load was American Eagle’s Rifle Suppressor 220 Grain Open Tip Match load. This was the heaviest grain bullet and, to my ear, sounded excellent and had a pleasant tone.

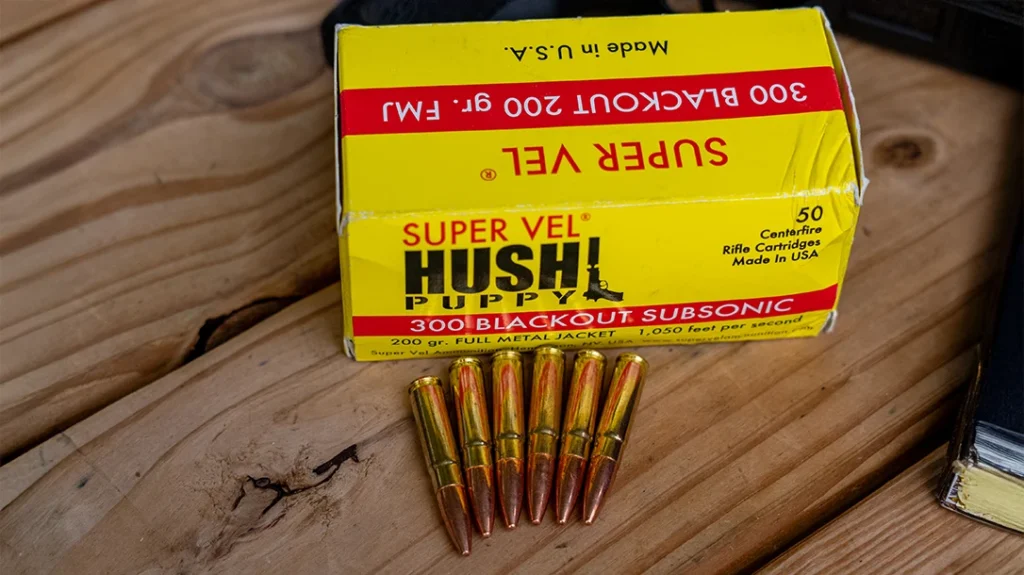
A similar load I shot was Super Vel’s 200 Grain “Hush Puppy” load, explicitly designed for use with suppressors. Unsurprisingly, this was a very quiet load and also had a nice tone to it. The benefit of this specific type of ammunition is that it is loaded with a powder that includes a flash retardant additive. This minimizes muzzle flash in low light and night conditions.
I shot more rounds with this ammo than the others. The muzzle flash reduction is most valuable to me because I plan to use this gun at night.
The final load was LeHigh Defense’s 198-grain Controlled Fracturing bullet load. LeHigh Defense offers several 300 Blackout loads, each designed with a specific purpose in mind and featuring different bullet types.
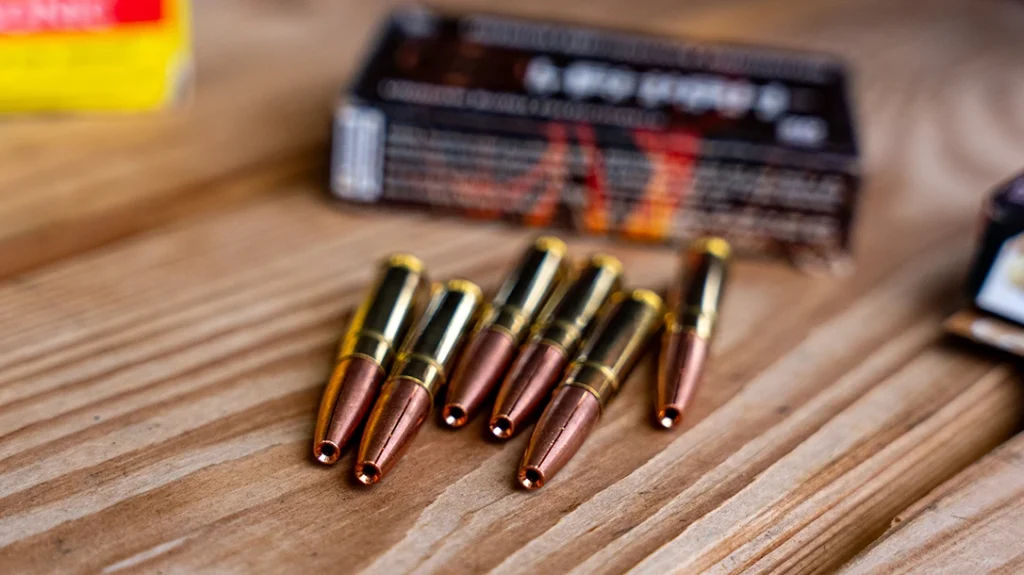
The reason I chose the controlled fracturing bullet is that the fragmentation creates multiple wound channels. This causes significant tissue damage and is more likely to hit vital organs or blood vessels. It is the optimal ammunition to use when hunting down pests and predators alike.
My ultimate goal is to harvest a hog with this ammunition using this complete setup of the Brawler. Hopefully, I’ll have a success story this fall for you readers!
Rossie Brawler .300 Blackout Specs
| Action | Single Action Only |
| Caliber | .300 Blackout |
| Capacity | 1 Round |
| Safety | Cross Bolt |
| Barrel Length | 9.00 inches |
| Overall Length | 14 inches |
| Overall Weight | 48.50 ounces (Unloaded) |
| Overall Height | 5.90 Inches |
| Overall Width | 1.30 Inches |
| Twist Rate | 1:8 RH |
| Grooves | 6 |
| MSRP | $324.99 |
WHY OUR ARTICLES/REVIEWS DO NOT HAVE AFFILIATE LINKS
Affiliate links create a financial incentive for writers to promote certain products, which can lead to biased recommendations. This blurs the line between genuine advice and marketing, reducing trust in the content.
The post The Rossi Brawler: Hunting with the Single-Shot Whisper Pistol in .300 Blackout appeared first on Athlon Outdoors Exclusive Firearm Updates, Reviews & News.
“}]]
