

")
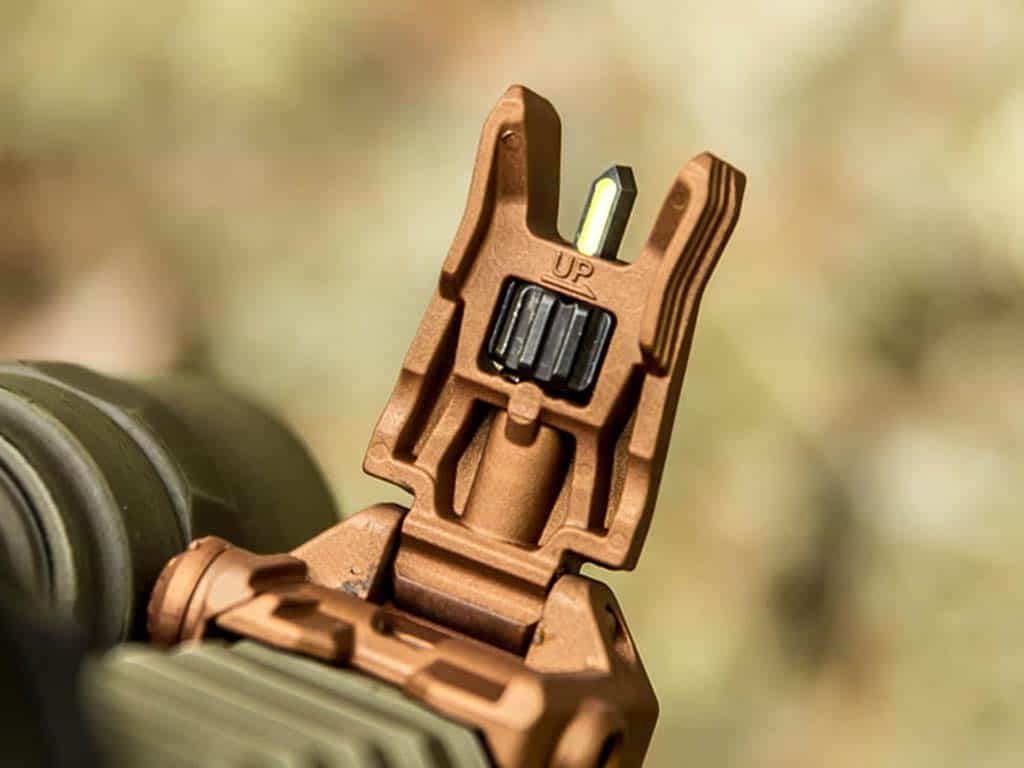
Most people don’t give much thought to it, but do you know how to use iron sights?
Thank you for reading this post, don't forget to follow and signup for notifications!
Before scopes and high-tech optics, this was the standard way to aim. Though many people will pull them off their rifles for upgraded optics, they are still tried and true.
Knowing how to use them properly is becoming a lost art, and iron sights also offer some benefits compared to modern optics.
This post will explain how to use iron sights, aim with them, and adjust them properly.
How To Aim With Iron Sights
Aiming with iron sights involves aligning the front and rear sights with the target to achieve a proper sight picture. Here are the steps to follow to aim with iron sights:
- Position yourself correctly: Stand with a stable stance, with your non-dominant foot slightly forward and your arms extended comfortably in front of you.
- Align the front sight: Bring the gun up to your eye level and focus on the front sight. The front sight should be centered horizontally within the rear sight aperture.
- Align the rear sight: Keep your focus on the front sight, and use your non-dominant eye to align the top of the rear sight with the top of the front sight.
- Align the front and rear sights with the target: Keep your focus on the front sight and use the rear sight to align the front sight with the target. The top of the front sight should be level with the top of the rear sight and centered in the rear sight aperture.
- Focus on the front sight: Keep your focus on the front sight and keep both eyes open. This will help you maintain a proper sight picture and improve your peripheral vision.
- Take the shot: Once you have a good-sight picture, gently squeeze the trigger to fire the gun. Keeping the sight picture until the bullet exits the barrel is essential.
Practicing and becoming familiar with the proper technique to aim with iron sights is essential. This will help you achieve consistency and accuracy when shooting.
The key is to keep your focus on the front sight and align it with the target, using the rear sight as a guide.
Why Iron Sights
Iron sights are a popular and reliable option for aiming a firearm, and there are several reasons why they are commonly used:
- Precision: Iron sights offer a more precise aiming point than other types of sights, such as red dot or holographic sights, as they provide a clear and defined point of aim.
- Simplicity: Iron sights are a simple and straightforward option for aiming, making them great for beginners or those who prefer a more traditional approach to shooting.
- Durability: Iron sights do not require batteries or other power sources, making them less dependent on external factors, and they are also less prone to breakage, which makes them more durable in the long run.
- Cost-effective: Iron sights are often less expensive than other types of sights, making them a cost-effective option for shooters.
- Versatility: Iron sights can be used in a variety of shooting scenarios, such as hunting, target shooting, or self-defense, making them a versatile option for any shooter.
Iron sights offer a reliable, precise, and cost-effective way of aiming a firearm. They are easy to use, durable, and can be used in various shooting scenarios, making them a great choice for any shooter, whether beginner or advanced.
Pros & Cons Of Iron Sights
Iron sights are a popular option for aiming a firearm, but like any other equipment, they have advantages and disadvantages. Here are some of the pros and cons of using iron sights:
Pros:
- Precision: Iron sights offer a more precise aiming point than other types of sights, such as red dot or holographic, allowing for greater shooting accuracy and consistency.
- Simplicity: Iron sights are simple and straightforward, making them great for beginners or those who prefer a more traditional approach to shooting.
- Durability: Iron sights do not require batteries or other power sources, making them less dependent on external factors and more durable in the long run.
- Cost-effective: Iron sights are often less expensive than other types of sights, making them a cost-effective option for shooters.
- Versatility: Iron sights can be used in a variety of shooting scenarios, such as hunting, target shooting, or self-defense, making them a versatile option for any shooter.
Cons:
- Limited visibility: Iron sights can be difficult to see in low light conditions or complete darkness.
- Slower acquisition: Iron sights require more time to acquire the target than other types of sights, such as a red dot or holographic sights.
- Limited adjustment range: Iron sights may not have a wide range of adjustment for windage and elevation, making it more challenging to zero them for long-range shots.
- Aging Eyes: As shooters age, their eyesight may deteriorate, making it difficult to focus on the front and rear sights clearly, which can affect accuracy and consistency.
They may have some limitations, such as difficulty in low light conditions, slower target acquisition, limited field of view, and limited adjustment range, and may be more challenging for shooters with aging eyes.
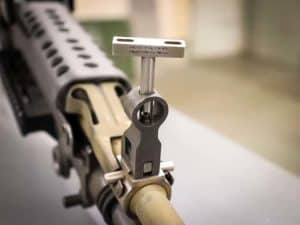
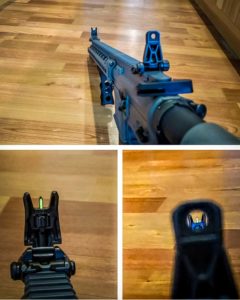
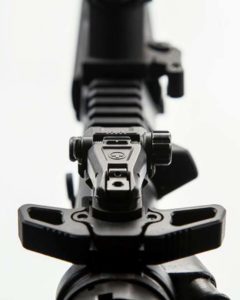
Types Of Iron Sights
Iron sights, despite the name, are not made of iron. They are typically made from various materials, such as steel, brass, aluminum, or plastic.
They are a type of firearm sight that consists of two pieces: the front and rear sights. These sights are used to align the gun and aim at a target.
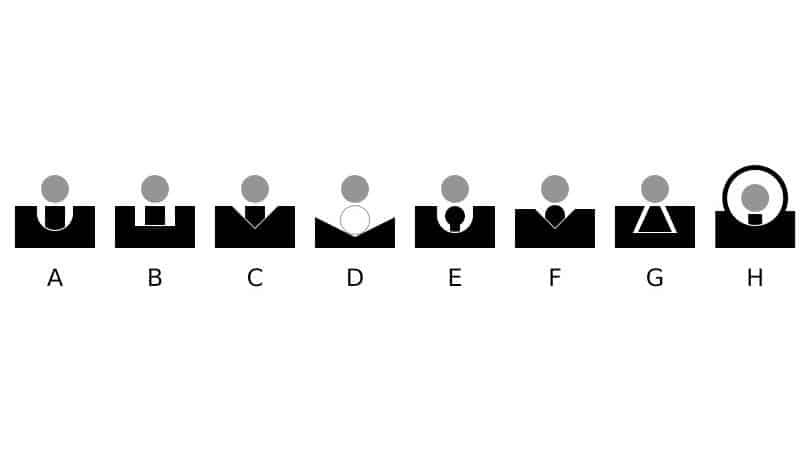
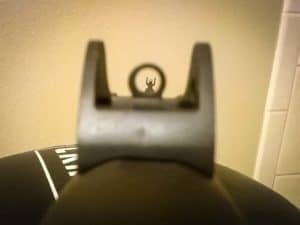
The two main types of iron sights are open sights and peep or aperture sights. Open sights feature a notch or mark for reference, while peep or aperture sights have a circular hole as a rear sight. The front sight can be a blade, bead, or aperture.
Open sights are easier to see but less precise than peep or aperture sights. Peep or aperture sights, on the other hand, provide a more accurate aim but can be harder to see and use. The choice of iron sight will depend on the shooter’s preference and the shooting scenario.
Related Articles
- MOA vs MRAD (Complete Guide)
- 5.56 vs .223 What’s The Difference (Full Comparison)
- How To Adjust A Riflescope (Complete Guide)
Iron Sight Aiming Fundamentals
Iron sights come in different shapes and designs, but their principles are the same. Proper sight alignment is crucial for accurate shooting and can be achieved by following a few key steps.
Sight Picture
The sight picture is what the shooter sees at the moment of the shot and should always be focused on the front sight.
The front sight should be aligned with the target and the rear sight, and the shooter should maintain a good body position, breath control, and trigger control to ensure accuracy.
Body Position
Proper body position is the foundation for accurate shooting, and the shooter should practice the “blind aiming” drill to achieve a relaxed, tension-free shooting position.
Breath control is also important, and the shooter should keep breathing normally while acquiring the target and settle into the sight picture before taking the shot.
Trigger Control
Trigger control is the process of applying pressure to the trigger without disturbing the sight picture, and it requires practice and steady pressure.
Follow-Through
Follow-through is the final step of the shooting process and involves maintaining the sight picture, shooting form, grip, and position after the shot is fired. The shooter should take their time and call the shot to improve accuracy.
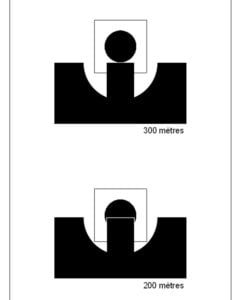
Rear open sights come in different shapes such as notch, “U”, “V”, wedge, buckhorn, and others, but the principles remain the same, the front sight should be centered and level with the top of the rear sight.
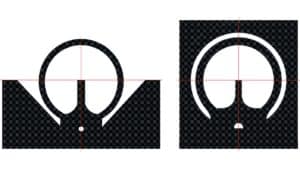
Aiming With A Rear Peep Or Aperture Sight

Aiming with a rear peep or aperture sight involves using a round hole in the rear sight to view the front sight and the target.
To aim properly, the shooter should center the top of the post or center of the bead on the target and in the center of the rear opening. It’s important to maintain a hard focus on the front sight.
Aiming With A Rear Peep And Front Aperture Sight
Aiming with a rear peep and front aperture sight is a variation of this technique and is generally used by target shooters with targets of a known size and distance.
In this case, the target, front aperture, and rear peep are all held centered and the shooter should maintain a hard focus on the front sight.
This method can provide more precision but it’s important to be aware that the front aperture can block a part of the field of view.
Iron Sight Adjustment
Iron sights come in many different models; each has its own method of adjustment or lack thereof. It’s important to read the full instructions that come with your specific iron sight system to understand how to adjust it.
However, one basic principle applies to all iron sights: After shooting a group, if an adjustment is needed, the rear sight should be moved in the direction that you want the bullet holes to go, while the front sight should be moved in the opposite direction.
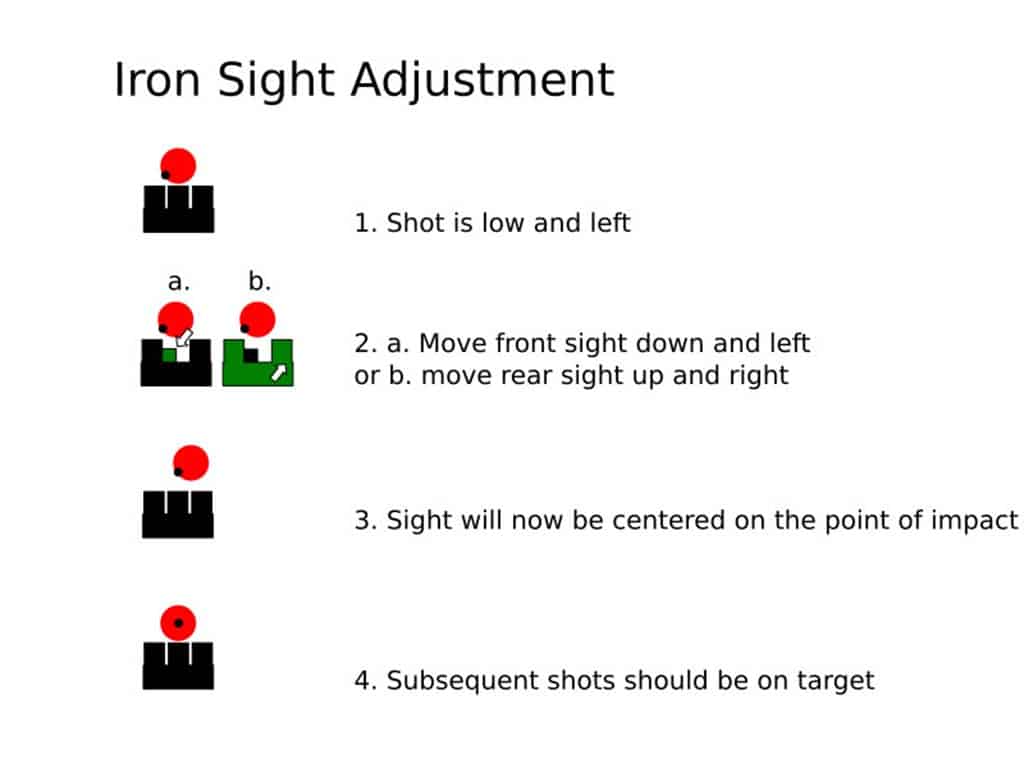
For example, if the bullet holes are to the left of the target, the rear sight should be moved to the right and the front sight should be moved to the left. This will help you to align the bullet path with the target.
How To Use Iron Sights FAQ
How do I align the front and rear iron sights?
To align the front and rear iron sights, you should focus on the front sight and use the rear sight to align it with the target. The top of the front sight should be level with the top of the rear sight and centered in the rear sight aperture.
How do I adjust windage and elevation on iron sights?
To adjust windage and elevation on iron sights, you should use the adjustment knobs or screws on the rear sight. Windage refers to the horizontal adjustment and moving it will move the point of impact left or right, while elevation refers to the vertical adjustment, and moving it will move the point of impact up or down.
How do I zero my iron sights?
To zero your iron sights, you should fire a few rounds at a target and adjust the windage and elevation until the bullet hits the center of the target. Once the sights are zeroed, the shooter can aim at the target and expect the bullet to hit where the sights are aligned.
Should I keep both eyes open when using iron sights?
Yes, it is recommended to keep both eyes open when using iron sights to have better peripheral vision and depth perception.
Can iron sights be used in low-light conditions?
Iron sights can be used in low light conditions but it can be more challenging to see the front and rear sights clearly
Further reading on Firstworldcrusader.com: Are you interested in learning more about guns and gear?
This list of the Best Red Dot Sights can help you choose the best optic for your rifle.
In addition, here are the Best AR-15 Upgrades & Accessories that can help you get more out of your primary battle rifle.
